|
|
Dogbone Traction, Part 4 (Rail3D), Continued
By Sanford Mace
Freight House
At this point you can add the freight house, wait house road, side house and station with the Show Scenery Library. Placing scenery objects is just like placing trains; drag them where you want. To move and edit the objects, turn on Show Scenery markers in the Scenery menu. It is the 7th thing down in the menu. You should see some thing like this:
Turn on Edit Track in the Track menu. When you click on the center of the Cyan cross, you can move the object. At one corner of the cross there is a red circle. Click on this and you can rotate the scenery object. The objects you choose and where you put them are up to you. I used a Swiss house for the road side house and a US station for the station. I used a road side structure for the wait house and a warehouse from Portugal for the freight house.
To add a road. Roads are tracks that look like roads. Lay a double track perpendicular to the main line just to the south of the station and use one of the road surfaces for the track type. If you want an active road you will need a crossing. Go to Mark Hodson's web site and select Docs in the main menu on the left. It is the 6th thing down under Main Menu. Then select Level Crossing. Follow the directions there to get your level crossing to work. You can then extend your road and add cars, trucks and busses to cross your track.
If you are going to run this like a tram system, check out Drive on Sight in the User Guide (under the Help menu). Go to index and type Drive on Sight. This will tell you how to set up this feature. It allows trams to run closer together.
If you want a more accurate version of the original, check out the directions for the digitizer in the User Guide. Enter Digitizer in the Index. Select Digitizer Tool to find the directions. You can use Al's original plan as the base. The size is 1.3 feet by 8.1 feet. Convert to meters, and multiply by 87 to get the size for the digitizer. Use the lower left corner as the 0,0 point (or 100,100 or 1000,1000 or whatever you want to start with).
At this point, you should have a working operation with running trains. I could get four small single unit trolleys or three trains to run on my version.
We will again try to duplicate Al�s original pictures from the Rail3D layout.
This is the top down view.
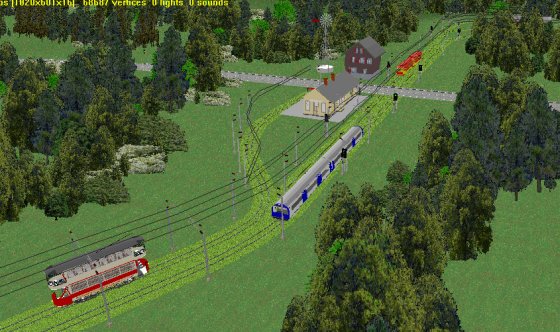
The view from the north to south.
A cab view. Note this is from a DMU, not a tram.
Three Versions
I made three versions of this for Rail3D. The first was made exactly as shown above. As of this writing I am running that with two very modern trams and a pair of Al�s NYC convertibles. I cannot find a good PCC just yet. I have not put any freight cars or box motors on the sidings yet because I have not looked at all that is available. The second is similar to one of the versions for MSTS; it runs with three long Japanese electrics. It is just as silly here as it was in MSTS and just as much fun. It does show how much abuse the Rail3D AI will take. The last was made by digitizing Al�s route. I experimented with this route. It is listed as Dogbone II.
These routes probably do not show off the best features of Rail3D. I am very much a novice user of this system, so building the routes helped me learn about this system. Check the Virtual Railroader Downloads page for these routes.
Conclusion
Over the course of two months I built very similar routes for three current train simulators: BVE, Microsoft Train Simulator (MSTS), and Rail3D. Two of them were built as a novice in the respective system. All took me about a week of short evenings to learn and build. Had I known what I was doing, I guess each would have taken a few hours. All three of them are nice routes and look good. Each looks different because of the way each simulator works, but all look surprisingly similar.
In two of the routes, BVE and MSTS, the routes were something that conventional wisdom said can not or should not be built; that is, a loop. Further research found that this could be done. Loops are not just for simulating model railroads, but are used in many real world systems such as tram/trolley loops, urban heavy rail loop routes and turnback loops in large rail yards.
Each route is a good simple tool to learn about the routes. None takes best advantage of what each simulator can do, but each simulator will do the Dogbone loop. Once built, these routes are more for looking at rather than running, but they all do the �eye candy� thing well. You could spend several more hours adding scenery to these routes to make them better, but I suspect your time would be better spent taking what you learned and doing something else.
If you wish to try, take my examples and start from there.
Have fun,
Sanford
 See the Dogbone Rail3D Slide Show See the Dogbone Rail3D Slide Show
<< Prev | 1 | 2
Article and screen shots �2006 Sanford Mace. All rights reserved.
More Articles.
[Visit the VR Reading Room.]
If you want to be notified when a new article arrives, join the VR-News group at Yahoo. This group is purely for notification. Anyone can join; only the moderator can post.
�2006 Sanford Mace. All rights reserved.
|
